
Download and Install
At the chair for network architectures and services, the team is actively maintaining the vLab – great work!
Please download it from here for diverse architectures (“NONE” should be the right image): https://ilab.static.net.in.tum.de/vLab/index.html
For running the vLab-OS you will need to install VirtualBox. This program allows you to run virtual machines on your computer. Get the latest version for you operating system from the official homepage.
There is also some documentation and further explanations if you have any questions about that. We tested the vLab successfully with Virtualbox 6 and VirtualBox 5.2.
If you experience issues with an older VirtualBox version, try to upgrade to the newest VirtualBox version first. If you have still issues importing/using the vLab, have a look at the FAQ or contact us if that doesn’t help.
After installing VirtualBox download the image from one our hosters (~1 GB) :
64 bit version (preferable):
Dropbox (64 bit)
Google Drive (64 Bit)
32 bit version (if your machine doesn’t support 64 bit, unlikely, but try it out if you get an error importing or starting the 64 bit version):
Dropbox (32 bit)
Google Drive (32 Bit)
Next you need to import the file into VirtualBox. This can be done by double-clicking the file (depending on your operating system) or going through the VirtualBox menu (File –> Import Appliance –> select the downloaded vLab-OS image –> Next). VirtualBox should present you the settings screen:
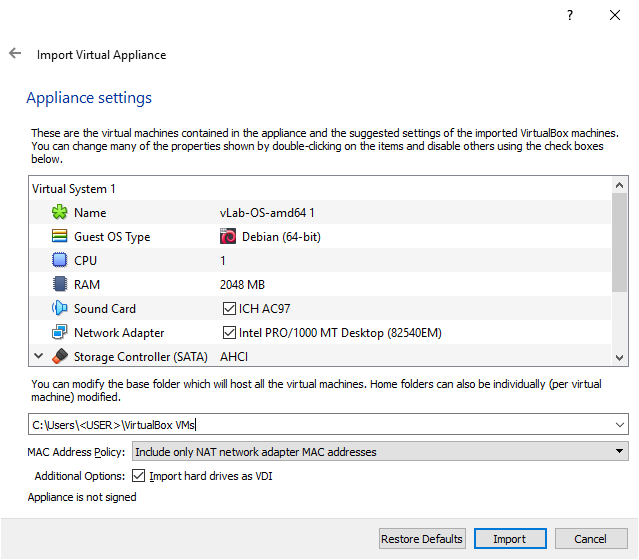
Here you can tweak the settings by changing processor count and memory (e.g. set the memory (RAM) to 1024 MB if you have less than 4 GB memory), but you should be fine just clicking Import. The import can take a few minutes to complete, depending on your computer specs but once it’s finished you are set to go.
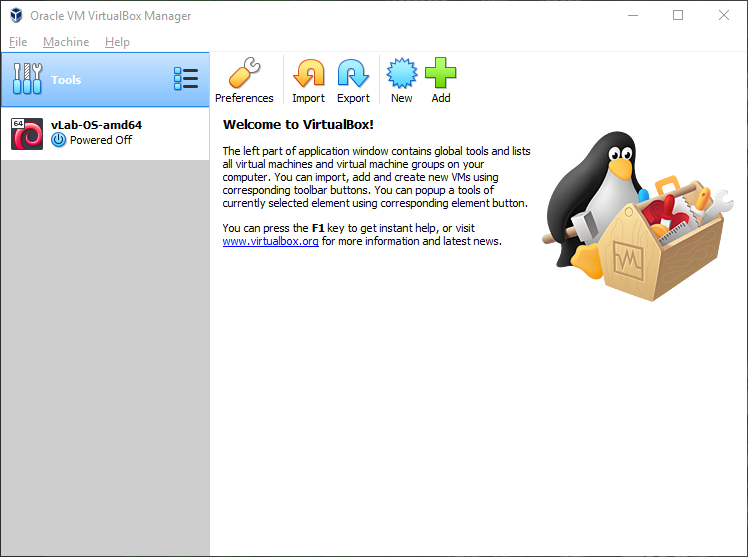
You should see a new entry in the VirtualBox main screen for your newly imported virtual machine. Start it by double-clicking on it.